Archive for the ‘Narrating the process’ Category


Slide Guy Visits the Sphinx

Monday, July 2nd, 2012

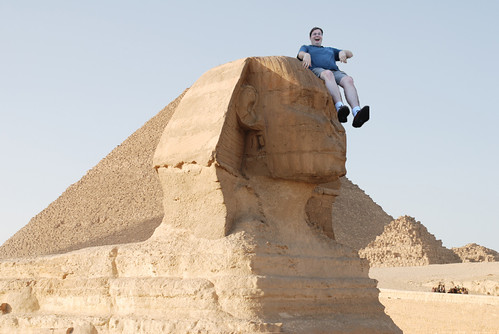
This is another Visual Assignment.  I couldn’t resist the opportunity to join in on the fun of placing the image of DTLT’s own Tim Owens in an unlikely spot.

I immediately thought of the pyramids, though I’m not sure why.  But then I found this great image from Flickr User wilhemja of the pyramids and the Sphinx, and I made a slight change in plans.  I used Photoshop to flip the image using the Image Rotation–>Flip Canvas command and then rotated Tim so that he could slide down the Sphinx’s face (that daredevil).

Slide Guy Visits the Sphinx


Two final comments:

1) This image is not to scale.  If Tim were this tall, he wouldn’t be able to fit into DTLT’s offices…or any other building on campus.

2) Umm Tim, where’s the nose?

Creative Commons Poster

Sunday, July 1st, 2012

I found the assignment to create a CC poster more difficult than I imagined, especially after struggling a bit with the Postcard assignment.

The assignment here was:

Use creative commons licensed images to design a poster about how groovy Creative Commons is! Use a tool like Compfight to find creative commons licensed images in flickr (be sure to select the right option on the search pane), and then use photo editing software to add your message, call to arms, rallying cry, urgent plea. Include as well a creative commons logo– look to the creative commons itself for ones to use.

Most importantly, in your poster be sure to give attribution credit to the source image.

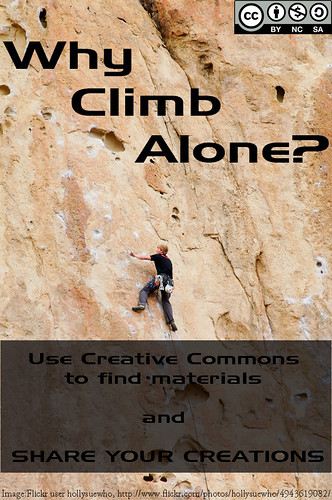
I didn’t have an obvious direction I wanted to go on this project, so just browsing CC-licensed images didn’t get me anywhere.  My sense of Creative Commons is one of easier sharing of creative efforts, but I didn’t know quite how to convey that.  Then I saw an image of a mountain that struck me and I thought of the collaborative work needed for most people to climb Everest and other tall mountains. [I know there are a few solo climbers still, but that's not the norm for most climbers.]  It got at the notion of creative practice being a collaborative effort, of building on the work of others, even if we don’t often think of it that way.  Unfortunately the image I saw was CC-licensed, but derivative works were not permitted (an apparent weakness in the Compfight search engine, unless I just missed that option).

So then I just started using Flickr’s advanced search for CC-images that allowed derivative works of mountain climbers and found this one from Flickr user hollysuewho.

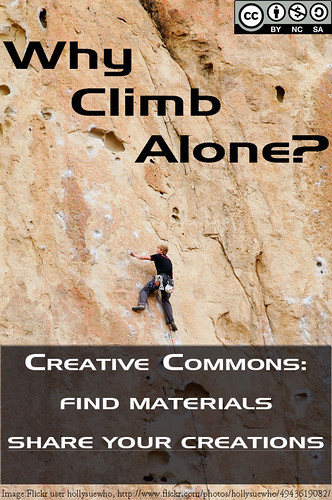
At that point, it was a matter of getting the right Creative Commons logo (hollysuewho’s photo was Attribution, Non-Commercial, and Share Alike, so my derivative work needed to be the same license), and figuring out the text.  I like the top slogan, but the bottom is still to wordy for my liking.  Still, it gets at both aspects of Creative Commons that worth advertising: use the CC-licensed materials that are out there AND share your own works that way.

I had some issues with using Photoshop to shading the bottom part and I’m still not happy with how it looks, but I would spent too much time fiddling with it. So, here it is.  Thoughts?  Recommendations?
Creative Commons Poster


UPDATE: After comments by John and Alan (and conversation with my spouse, @jenorr, I did a new version of the image that I’m much happier with.
 

CC Poster--Revised text

Visual Assignment–Time of Day and TDC 149

Friday, June 8th, 2012

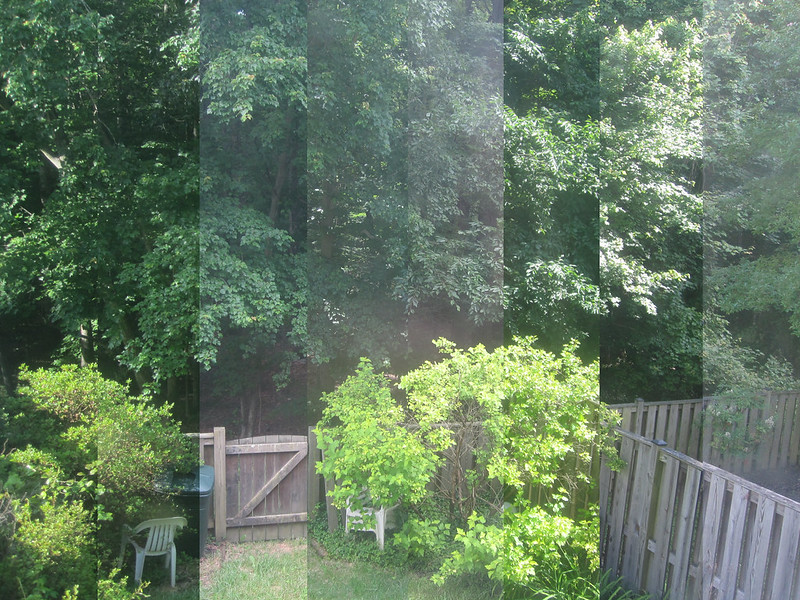
My second attempt at one of the Visual Assignments from the DS106 repository is Time of Day, which appealed to me because of the image appearance and because I wanted to try some more work with layers and combining photographs.

Take a picture of the same spot outside several times in a day, then merge them all together in a way that shows the differences in appearance over the day.

When the Daily Create for that day turned out to be take a picture multiple times over the course of a day and represent it as one picture, it seemed an obvious choice.   So I set up a small camera on a tripod and took a picture every hour at 6 after for 12 or so hours.

This was my finished product with the earliest photo in the strip on the left and the latest in the strip on the right, but it didn’t come easy for me.

Time of Day

The editing of these images (I ultimately used 8 of the 12) was particularly difficult one for me, mostly because of my unfamiliarity with Photoshop.

Scott Plunkett‘s tutorial for the assignment gave me a good approach for what I needed to try to do (specifically to just cut off increasing slices and layer them on top of the base image), but he used MS Paint and I wanted to try to figure it out in Photoshop.

I tried multiple wrong ways to edit them down and managed to crash Photoshop three times and my computer twice  in the process.  I walked away and came back the next day.  This is the process I finally figured out:

  • I opened up all of the images I was going to use in Photoshop
  • My base image here was the last image taken (on the finished photo, you can see the strip on the right side).
  • Then I took the next-to-last image and selected the section I wanted to keep – I calculated that each section would need to be 1/8 of the photo (in this case, I was using inches, ~2.75 per slice).  That meant that each section would be 2.75 inches smaller than the previous one.
  • For each photo, after selection the section that I wanted to keep, I right clicked on the photo, chose Layer via Cut, which creates a separate layer with just the selected material.  Then I right clicked on that layer (Layer control is usual in the right lower corner of the PS screen) and chose Duplicate Layer.  For output, I used the pull down menu to choose the base layer photo.  That places the cropped layer onto the original photo.
  • Then I just repeated the process, in reverse chronological order, cutting more and more off of the succeeding photos until the last one was just a single 2.75″ wide strip from the far left size and layering them onto the base image with all the other images.  The result, an image with 8 layers, saves as the image you see above.

Once I figured out the process, it was fairly easy, but it was a bit frustrating as I flailed around a bit.  Still, I’m pretty satisfied with the result.