Archive for the ‘VisualAssignments352’ Category


Two Quick Wigglers

Saturday, July 28th, 2012

I thought it was time to try the ds106 Wiggler Spectroscopy assignment:

Take two photos of the same subject from slightly different angles. Merge the two photos into a single looped, animated gif to create a wiggle stereoscopic image that simulates 3-D.

I decided to use my pal Spike, the metal dog in my front yard, taking about 4 pairs of photos. As ti turned out, my angle of different between each pair was a bit too much, but some of the ones that were similar in angle had enough different to make it interesting:
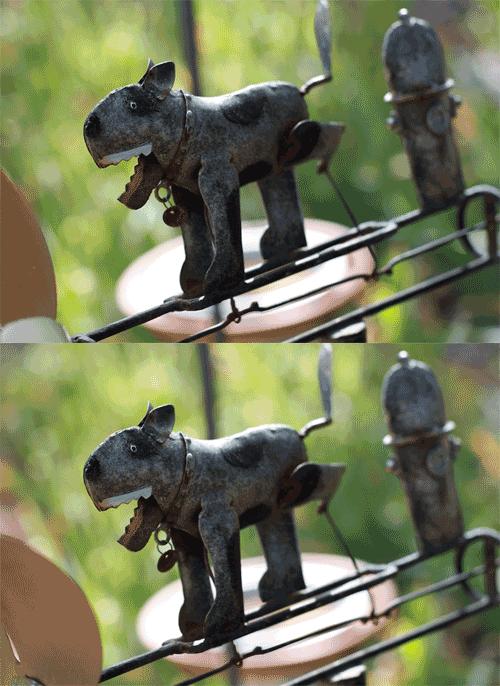
and from the other side…
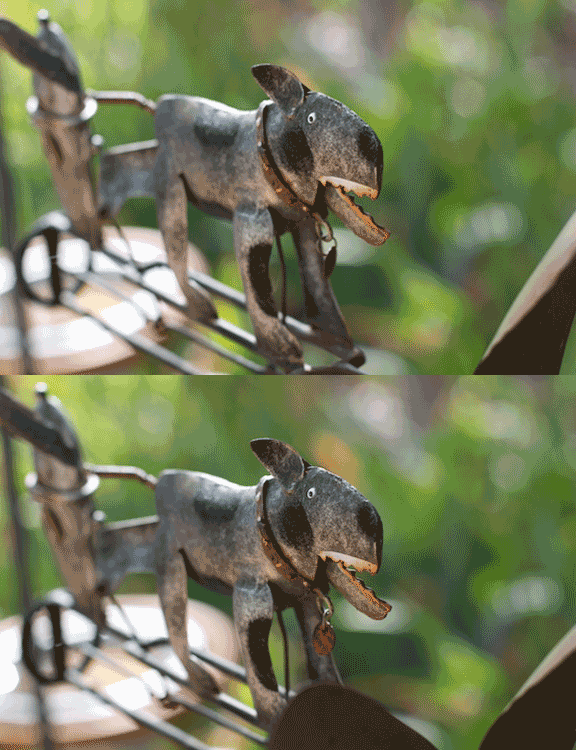
I made mine in Photoshop by using the File -> Scripts -> Import into Stacks command, using the option to align objects- this has the effect of keeping Spike mostly motionless but animating the background.

Usually I have to do some futzing back and forth from the timeline view to the frames view in the Animation window. I select all the icons and set the animation speed to the quickest option (0.1s), Keeping the size at 500pixels wide, and 64 colors for the GIF options kept the files small (under 300k each).

Wiggling is fun! Spike is just happy to wiggle all day because…. what else is there to do?

Metal Mushrooms in Stereo

Tuesday, July 24th, 2012

I have been dying to do the Wiggly Stereoscopy assignment by Bill Genereux—it basically uses the animated GIF method to create a 3D effect with just two images. It sounds easier than it really is—nailing it is all in the images you choose—though I must say Norm makes it look easy. Once I had two images I believed would work I wanted to see if I could find some useful tips from folks in ds106 who already did the assignment. Turns out I could, Katie Girard wrote this helpful post that introduced me to the animation filter in GIMP, something I knew nothing about.

Not only can you use the Animation filter to view the image moving through the layers, but you can also change the speed using this helpful tidbit from Katie:

….under Filters >  Animation, I chose Playback….you can see your .gif in action as it rotates between layers. To change the delay between the two frames, select the layer and add a time written in milliseconds using this format: [imagename (nms)] where n = the number of milliseconds. I chose to use 750ms.

The default speed worked well for my stereoscopy, but here is a more specific tutorial for changing the speed at which layers switch in GIMP for anyone interested.

One thing this reinforces for me is how amazing the ds106 assignments repository is. It not only has a ton of great assignments but lists everyone who has done that assignment. Sure some links to example posts will break in time, but the bottom line is it gives other people thinking about what to do ideas, inspiration and even helps them learn some technical details they might not have known otherwise. As time goes on I’m convinced we’ll see more and more tutorials in the assignment repository as well, and to that end this post is the change I want to see ;)

ds106: Wiggle Stereoscopy

Thursday, June 28th, 2012

I’ve been a bit MIA at Camp Magic Macguffin for the past week as the family has been in San Diego having a wonderful time. Oddly enough, even on vacation with my family ds106 has not been far from my mind. Walking around Legoland I had many thoughts about assignments, both current ones and possibilities.

We took in Miniland, an area full of cities and creations made of Legos. It’s really quite impressive. I took a few pictures of this Lego steamboat with the purpose of creating a wiggle stereoscopy image. I ended up only using two of the images after trying to get one that worked the way I wanted.

Lego Steamboat

I’m finding as I work through ds106 assignments (slowly, but still) that I don’t fully understand why I think things work or don’t work. Hopefully as I continue with this process I’ll hone my eye and begin, to a bit at least, to be able to explain my thinking.

3d wiggler animated gifs for #ds106

Thursday, June 7th, 2012

I find these 3d wiggle stereoscopy animated gifs really fascinating, so I tried it.
I took a lot of pictures down at Lake MacGuffin this past weekend, so I found some shots that looked like they would work.
If you haven’t seen them before, here’s the basic idea. You take 2 shots of a subject from slightly different position or angle and then make them into an animated gif. If done right, you get a 3d-like effect.

If they’re not wigglin’, click on the image to get it going.


For the bird gif, I put the two images into separate layers in Gimp. I made one of them 50% opaque while I worked so I could see them both superimposed. Then I used the move tool, the scale tool and the rotate tool to try to get the main body of the bird matched up in both layers. Then I set the opacity  back to 100% and cropped the whole thing so that both layers were the same size and shape. I saved it as an animated gif and set the interval to about 150ms. I used the same general technique for the other one as well.

Here’s a few links with some more examples and explanations of the effect.

Jim Gasperini http://www.well.com/user/jimg/index.html
Wiggle stereoscopy – a new approach http://sunpig.com/martin/archives/2005/12/12/wiggle-stereoscopy-a-new-approach.html

That’s my story. Any Questions?