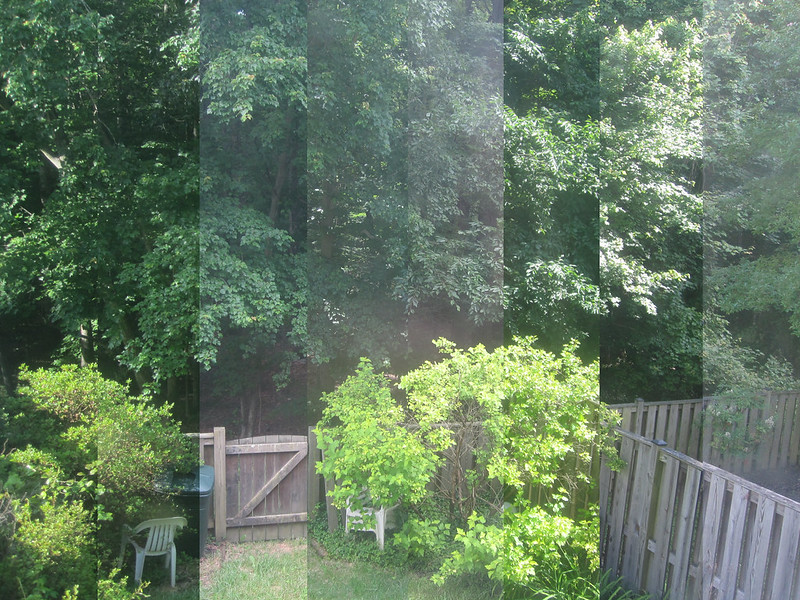
My second attempt at one of the Visual Assignments from the DS106 repository is Time of Day, which appealed to me because of the image appearance and because I wanted to try some more work with layers and combining photographs.
Take a picture of the same spot outside several times in a day, then merge them all together in a way that shows the differences in appearance over the day.
When the Daily Create for that day turned out to be take a picture multiple times over the course of a day and represent it as one picture, it seemed an obvious choice. So I set up a small camera on a tripod and took a picture every hour at 6 after for 12 or so hours.
This was my finished product with the earliest photo in the strip on the left and the latest in the strip on the right, but it didn’t come easy for me.
The editing of these images (I ultimately used 8 of the 12) was particularly difficult one for me, mostly because of my unfamiliarity with Photoshop.
Scott Plunkett‘s tutorial for the assignment gave me a good approach for what I needed to try to do (specifically to just cut off increasing slices and layer them on top of the base image), but he used MS Paint and I wanted to try to figure it out in Photoshop.
I tried multiple wrong ways to edit them down and managed to crash Photoshop three times and my computer twice in the process. I walked away and came back the next day. This is the process I finally figured out:
- I opened up all of the images I was going to use in Photoshop
- My base image here was the last image taken (on the finished photo, you can see the strip on the right side).
- Then I took the next-to-last image and selected the section I wanted to keep – I calculated that each section would need to be 1/8 of the photo (in this case, I was using inches, ~2.75 per slice). That meant that each section would be 2.75 inches smaller than the previous one.
- For each photo, after selection the section that I wanted to keep, I right clicked on the photo, chose Layer via Cut, which creates a separate layer with just the selected material. Then I right clicked on that layer (Layer control is usual in the right lower corner of the PS screen) and chose Duplicate Layer. For output, I used the pull down menu to choose the base layer photo. That places the cropped layer onto the original photo.
- Then I just repeated the process, in reverse chronological order, cutting more and more off of the succeeding photos until the last one was just a single 2.75″ wide strip from the far left size and layering them onto the base image with all the other images. The result, an image with 8 layers, saves as the image you see above.
Once I figured out the process, it was fairly easy, but it was a bit frustrating as I flailed around a bit. Still, I’m pretty satisfied with the result.


