Archive for the ‘magicmacguffin’ Category


Slacker!

Friday, June 8th, 2012

I promise, I was not slacking this week. It was just that…well, no excuses, I was slacking at DS106/Magic MacGuffin this week, entirely. The week, though, was very productive in non-DS106 ways.

This week I managed to get two of the assigned five Daily Creates finished. I am holding out hope but with a Brinner Party to get ready for Saturday night, I can make no promises other than I’ll have DS106 Radio to keep me company.

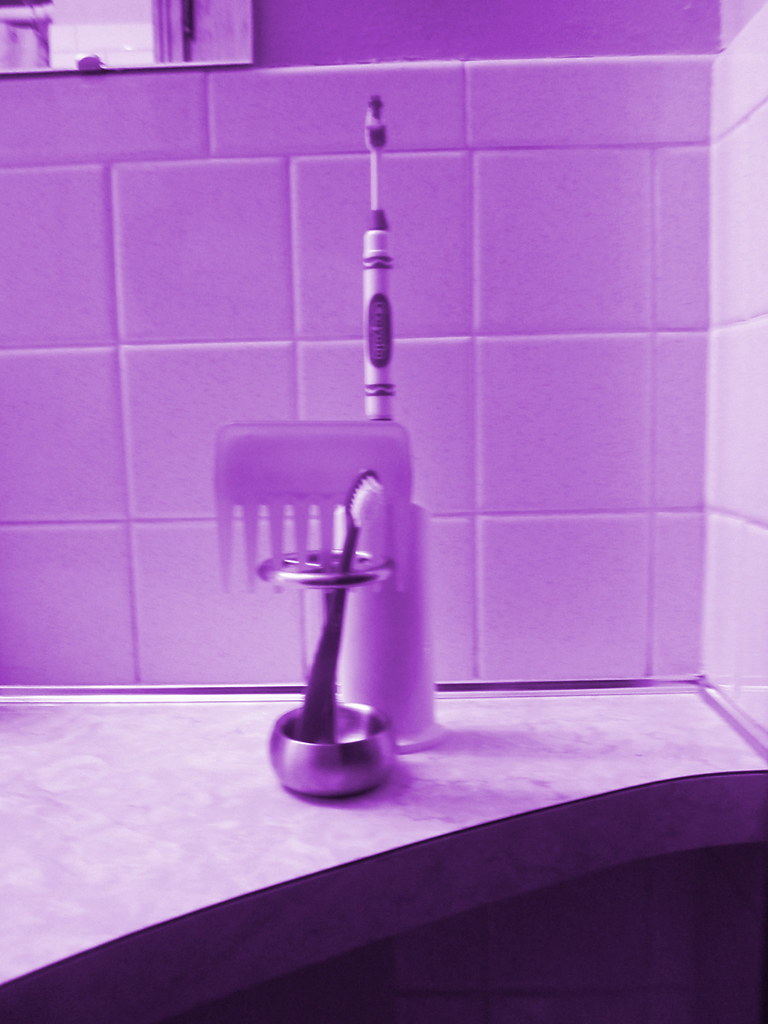
Daily Create #1 – Make a monochrome photo.

I took this picture of my daughter’s bathroom sculpture and I’ve been trying to find ways to use her inspiration to jumpstart my week of storytelling.

The toothbrush in front is the “introducer” who announces you
as you enter the comb/toothpaste/toothbrush tower.

Daily Create #2 – Tell a story about your most random job.

This was a ripper of a job and this is only part of the story. Oh the things I could tell you. Like the time when one of my crew tried out the invisible fence and almost passed out or the time when I slipped on an muddy incline during a rain storm and fell only to find out from my boss that was my fault. None the less, here’s the story.

So, those are my two of five creates. I’ll try to slip in one or two more this weekend. The brinner party might provide some storytelling materials.

Turning a photo into a drawing

Friday, June 8th, 2012

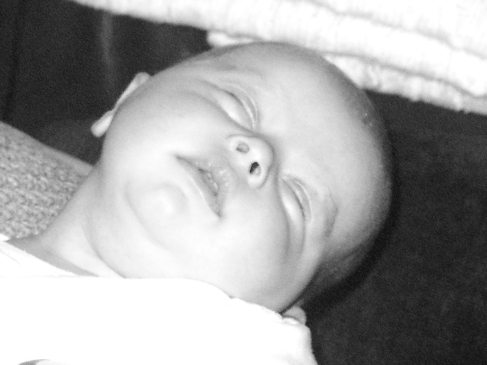
Task for digital storytelling course DS106 was to transform a photo into a drawing.

Here’s the original – I chose a photo that meant something to me (this is a friend’s baby) and that had plenty of light and dark areas.  

Image

Using Serif PhotoPlus (don’t ask, it came with my computer), I wanted to see if you could represent the curve of skin as effectively through digital shading as you can with a pencil…. I tried this two ways: firstly, by using the pencil draw quick-fix tool under the Artistic menu.  It didn’t work out that well, as you can see:

Image


I then followed J-rabbit’s excellent tutorial which got me much close to the effect I was hoping for….

Image

It needs a little more grainyness, and perhaps some more dark areas to really show the potential of the shading, but overall I think this is a good start.  Thanks J-Rabbit!

You’re All Right

Friday, June 8th, 2012

I didn’t know about the Say It Like the Peanut Butter assignment until I noticed kag0715′s awesomely frightening first animated GIF come through the ds106 stream.

The assignment requires us to create an animated GIF from our favorite or least favorite film – the clip should be one which captures the essence of the scene with a minimal amount of movement. I chose to go with a moment in my favorite scene from my favorite movie: The You’re All Right scene from Repoman.

The brilliant YouTube Downloader plugin for the Chrome browser was used to grab the clip. With this plugin installed, videos on YouTube can be downloaded with a single click of a button that automagically appears below the player.

The next step was to trim the segment of the clip I wanted to use in MPEG StreamClip – I chose 8 frames per second for the 1.2 second clip. This produced a half dozen or so png files which were opened in GIMP as layers.

Using the Filters > Animation menu choice, which I just learned about today from Alan, I was able to narrow my choice down to three frames. As there was a bit of distracting camera movement causing Otto to jitter back and forth, I decided to use Jim’s layer masking technique to animate just the beer pouring out of the can. Everything but the beer has been removed from the two topmost layers except for the bear stream. This allows the still frame from the bottom layer to show for the entire loop.

After cropping and resizing (scaling) the image, I saved it as a GIF and set the delay rate to 160 ms.

I’m pleased and surprised that the entire file weighs in at 70 kb. My next step will be to turn it into a tga texture file and take into Second Life to sell at Scottlo’s Animated GIF Emporium. The price, as with all other items, will be 106 Linden dollars – or two for twice the price.

Visual Assignment–Time of Day and TDC 149

Friday, June 8th, 2012

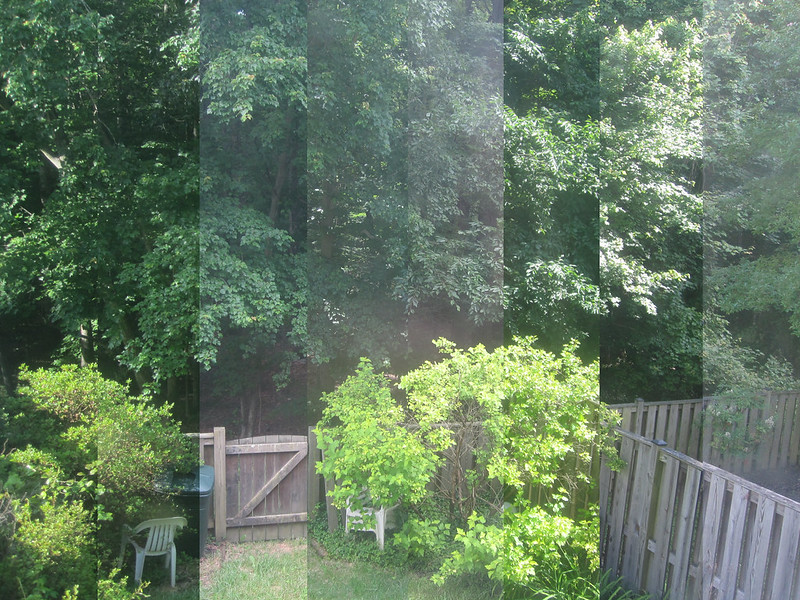
My second attempt at one of the Visual Assignments from the DS106 repository is Time of Day, which appealed to me because of the image appearance and because I wanted to try some more work with layers and combining photographs.

Take a picture of the same spot outside several times in a day, then merge them all together in a way that shows the differences in appearance over the day.

When the Daily Create for that day turned out to be take a picture multiple times over the course of a day and represent it as one picture, it seemed an obvious choice.   So I set up a small camera on a tripod and took a picture every hour at 6 after for 12 or so hours.

This was my finished product with the earliest photo in the strip on the left and the latest in the strip on the right, but it didn’t come easy for me.

Time of Day

The editing of these images (I ultimately used 8 of the 12) was particularly difficult one for me, mostly because of my unfamiliarity with Photoshop.

Scott Plunkett‘s tutorial for the assignment gave me a good approach for what I needed to try to do (specifically to just cut off increasing slices and layer them on top of the base image), but he used MS Paint and I wanted to try to figure it out in Photoshop.

I tried multiple wrong ways to edit them down and managed to crash Photoshop three times and my computer twice  in the process.  I walked away and came back the next day.  This is the process I finally figured out:

  • I opened up all of the images I was going to use in Photoshop
  • My base image here was the last image taken (on the finished photo, you can see the strip on the right side).
  • Then I took the next-to-last image and selected the section I wanted to keep – I calculated that each section would need to be 1/8 of the photo (in this case, I was using inches, ~2.75 per slice).  That meant that each section would be 2.75 inches smaller than the previous one.
  • For each photo, after selection the section that I wanted to keep, I right clicked on the photo, chose Layer via Cut, which creates a separate layer with just the selected material.  Then I right clicked on that layer (Layer control is usual in the right lower corner of the PS screen) and chose Duplicate Layer.  For output, I used the pull down menu to choose the base layer photo.  That places the cropped layer onto the original photo.
  • Then I just repeated the process, in reverse chronological order, cutting more and more off of the succeeding photos until the last one was just a single 2.75″ wide strip from the far left size and layering them onto the base image with all the other images.  The result, an image with 8 layers, saves as the image you see above.

Once I figured out the process, it was fairly easy, but it was a bit frustrating as I flailed around a bit.  Still, I’m pretty satisfied with the result.


TED Talk: “APOPcalypse”

Friday, June 8th, 2012

I took this class, I worked with this guy. Epic.

CC AttributionJim Groom talks about the crisis narrative in pop culture and how it relates to education. He discusses the ground-breaking class DS106 and how students become informed, empowered citizens of the Internet.

Daily Create 152:  Tell as story about your most random job.

Friday, June 8th, 2012


Daily Create 152:  Tell as story about your most random job.

Hey. Have you heard about my band?

Friday, June 8th, 2012

A lot of folks are doing some really fun album covers, so what the hell.  Let me get in on the create too.

Here’s what you need to know:

Band name:  Galeophobia

Wikipedia does not have an entry for Galeophobia, so if you have some time to kill perhaps you could fill that Wikipedia void.  Wiktionary says that Galeophobia is (1) a fear of cats and (2) a fear of sharks.  I have no idea how sharks and cats are related.  There is also another term for the fear of cats.  It’s called ailurophobia.  But all of this is boring.  Back to the fun stuff.

Album title:  Part of Your Essential Being

I didn’t have a specific photo editor in mind.  I knew I wanted to use something I’ve never used before.  I did a search for web photo editor and selected Befunky, because it was kind of near the top and I am not discerning.  It’s an easy tool to use though the font choices are limited.  There are lots of photo effects though.  I also like the fact that the tools can be used without registering as a user.

I’m pretty sure that Galeophobia is a metal band, so I selected some gothic fonts and made them as hard to read as possible, which is what metal bands are wont to do.  I did the “Galeophobia” first and applied my changes.  I wanted to change the positioning of the band name after applying said changes, but was unable to figure out how to do that without redoing the image.  I then added the album title, played around the with coloring, and called it a day.  Here it is:

album cover art

First go

I was having fun though and I had some time to kill before graduation, so I decided to do another cover.  Fun times!

another album cover, because a band has to have choices.

Scottlo: My Virtual World Can Beat Up Yours

Friday, June 8th, 2012

I’m really worried about our brother Scottlo. It seems he has drunk some weird potion and is mesmerized by some beach front pixel property in Second Life, some place called Conoway Cay or something like that. Over here in Camp Magic Macguffin, we are hacking out a whole new world inside Minecraft, and poor Scottlo is in some sort of trance of the SL Sirens.

Therefore, we are planning a Minecraft Scottlo Extradiction Strikeforce (MSES), and I made a few epxloratoary forays into that oversexed virtual world to check things out:

I even kindly left him a few toys to play with, because in his broadcasts he seems to lonely.

But can you believe it? Scottlo just tossed them in the trash. What happened to my friend of old? Cannot you see how all those SL furries and crazy sales people high on Linden dollars have corrupted him?

Since Scottlo has been eager to set up his ability to broadcast live to a Google hangout from Conoway Cay, as part of the MSES plan, I am seeing if we can do the same from Minecraft (or “Minesweeper” as Scottlo calls us). I am understanding the audio set up thanks to the tutorial; I gave it a try tonight but had trouble getting Google Hangout to let me switch the audio input source (it needs to be Sounflower 2CH from Ladiocast).. but I think it was because I need to set that before boosting up Ladiocast.

Anyhow, I wanted to do at least a basic broadcast from Camp Magic Macguffin in Minecraft, from my new doghouse there:

WE ARE COMING TO YOU SCOTTLO! Rescue operation is in ready state, and we hope to parachute in very soon.

I Can’t GIF it Out of My System

Friday, June 8th, 2012

This has to stop, but not tonight. I missed the fun of the afternoon shit talking and gif smacking today. With some positive feedback on the last batch, I set out again to see what I could do with GIMP as a tool.

For these next two I went for very original material, stuff you cannot get on the internet- some of the videos from the Storybox as my intended purpose was to keep the raw material on the pirate box but allow remixes to float out on the open web.

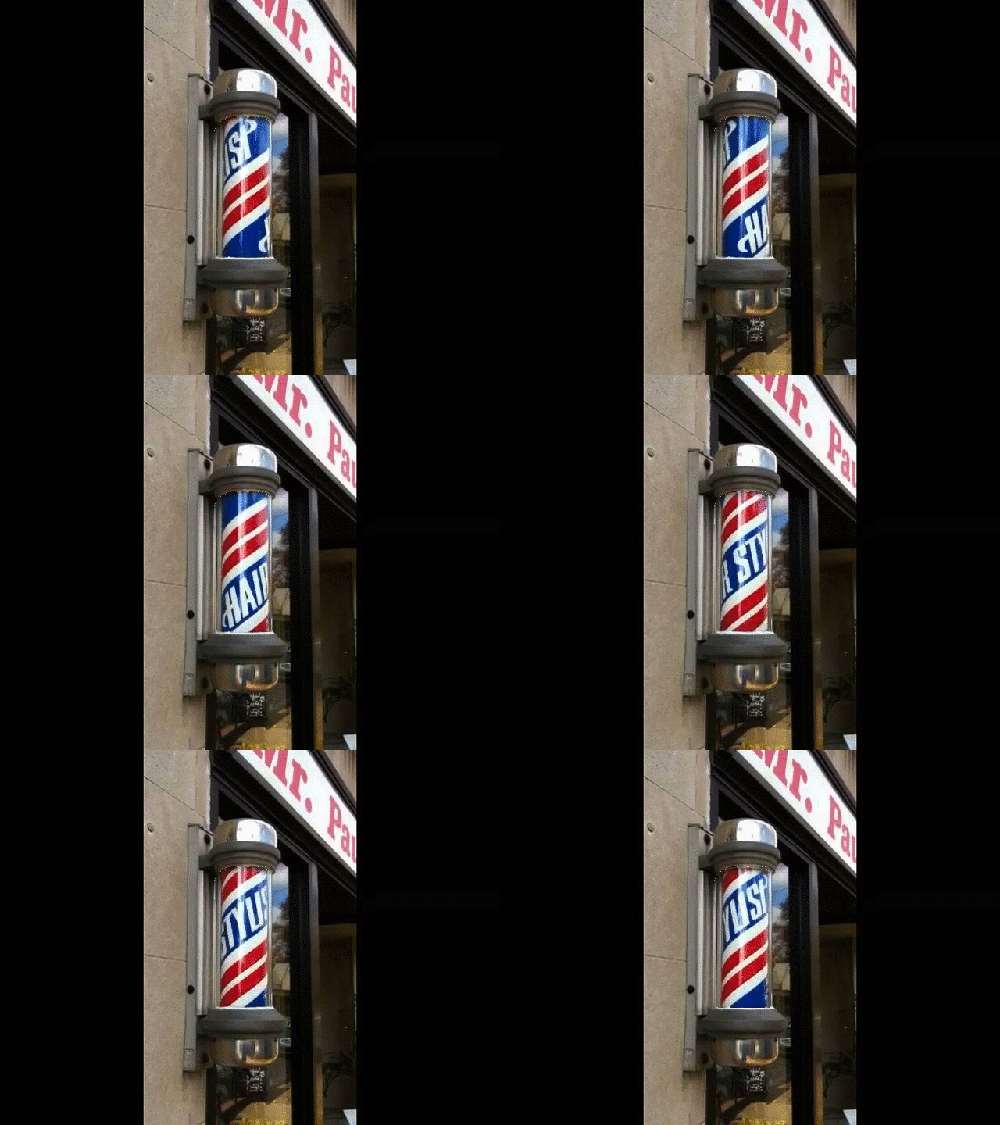
This first one was a barbershop pole spotted maybe in British Columbia- I had some shaky hand held video, but found at least one short segment where there was little jarring for one spin:

BUt there was still jiggle. So I made a selection of just the moving pole part, and deleted everything else from 6 of the 7 frames. What I cannot figure in GIMP is how to make a deleted selection transparent; mine got filled with white. I solved the problem by making a copy of the lowest frame, which was a full image. I then used the same selection to fill the same area with white.

I then made a duplicate of this frame and moved it below each of my single frames, set the mode of the layer to “darken”, and merged each layer down. This I ended up with frames where all the movement was within that bit I had saved fro each layer.

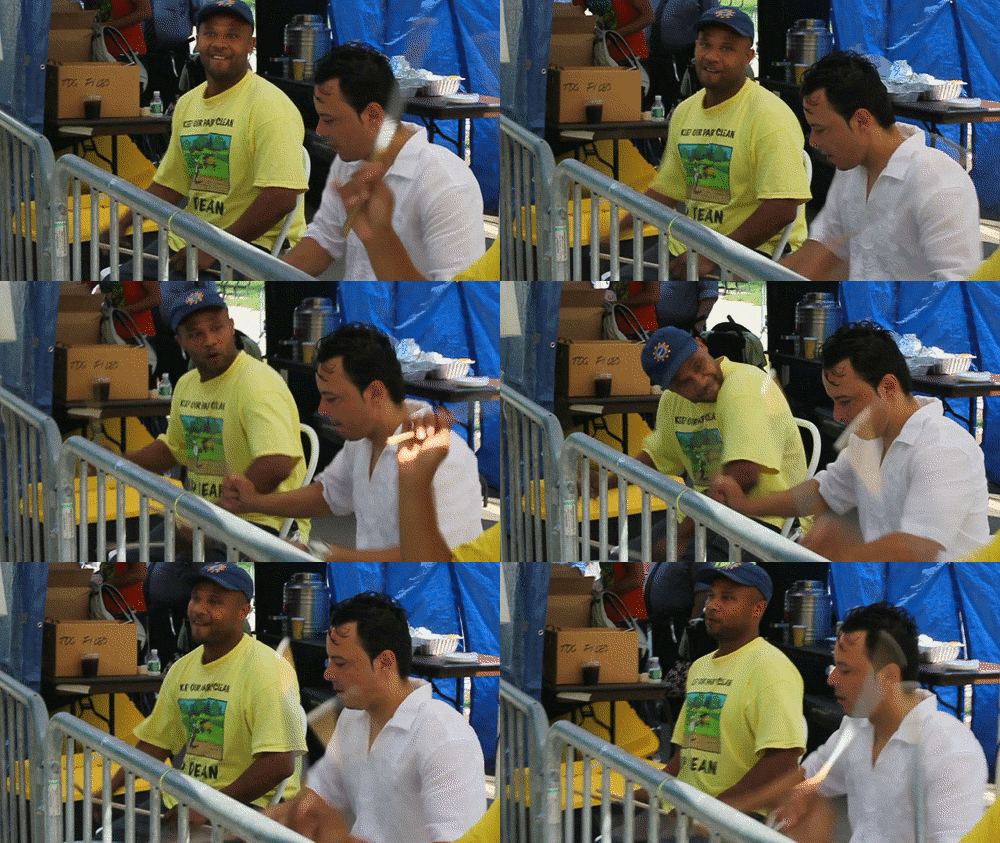
This next one was form video I took in Central Park, New York. I heard form afar the loud banging of drums, and came across a protest of people at the boathouse who were protesting the management- their goal was to convince tourists not to go inside, and they were pretty darned successful I recorded some of the audio and spoke a little to the protestors, but I loved most the intensity of these drummers banging on plastic jugs and the metal rails of the barriers. The sound is just exported from the original video clip.

My next GIF hope is to do a movie poster in the caliber of Michael Branson Smith.

A dog can only hope.

UPDATE (June 8, 2011): There is a better way, as pointed out to me by Scottlo, in the masking method that Jim Groom explains in a great screencast. I’m going to be a masking mad daog now in the GIMP.

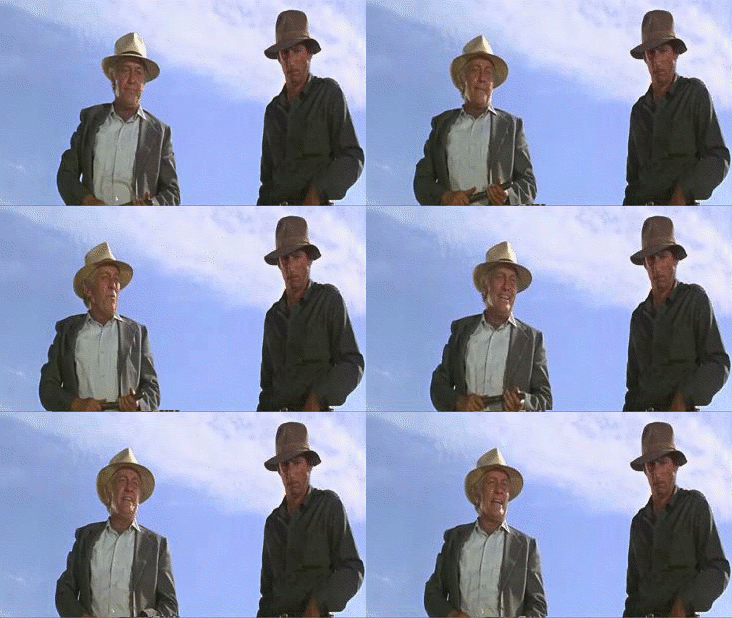
We do have a success to communicate; I was able to isolate the Strother Martin character’s classic Cool Hand Luke Line, and leave the other dude on the right not moving. I have a little bit of background flutter in the clouds, but now that I know how to do alpha masks on layers….

On Being A Monkey

Friday, June 8th, 2012

mONkEyhouse monkeyThis is a preliminary post which will be added to over time.  Members of the ds106 digital storytelling group The Monkey House may be interested in some of these resources and hints for use with MineCraft.

1) Monkey Skins are available for your MineCraft dude (while you are waiting to customize your own).

The Skindex currently shows 23 skins when you search for “monkey.”
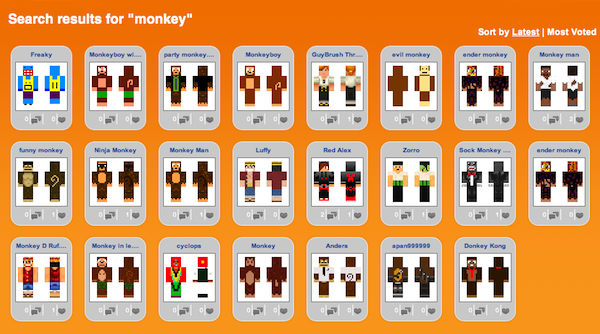
You can either download the .png skin file for use further editing, or you can upload it directly to  your Minecraft profile so that you immediately look like a proper chimp.

2) Monkey House Texture Pack: Following on a question from @BenjaminHarwood, I investigated the Texture Pack feature, and created the beginnings of a Monkey House theme that substitutes a banana for the apple, and introduces some simple monkey artwork.  To achieve this end,

a) download the Monkey House Texture Pack: MC_mONkEyhouse_v1.zip to a spot you can locate on your computer. The texture back is in a ZIP file format. Do NOT unzip it.
b) Run Minecraft. If you already have Minecraft running, make sure you save and quit the world: you need to be in the main menu to continue.

c) Click Texture Packs button.

d) Click Open Texture Pack Folder button; this will open the folder where minecraft stores all texture packs. If nothing happens, you need to find the folder manually. Depending on your operating system it is:

  • Windows XP/Vista/7: %AppData%\.minecraft\texturepacks
  • Linux: ~/.minecraft/texturepacks (This folder may be hidden in the Home Folder)
  • Mac OS X: ~/Library/Application Support/minecraft/texturepacks (This folder may be hidden)

e) Do not close Minecraft. Place the texture pack (ZIP file) in the opened texture packs folder, do not unzip.

f) In a few seconds the texture pack will appear in Minecraft. Select it and click Done. The texture pack is now applied, you may load your world and see the difference.

You should now see the world through a Monkey’s eyes.

This texture pack will likely evolve over time. I need to address the object naming, create a golden banana, and turn the regular cake into Banana Cake. Other suggestions?

There is more information about Texture Packs on the Minecraft wiki.

Here is a shot of some of our members of The Monkey House posing in front of one of the monkey pictures, with the pile of “apples” replaced (from my perspective) with bananas.
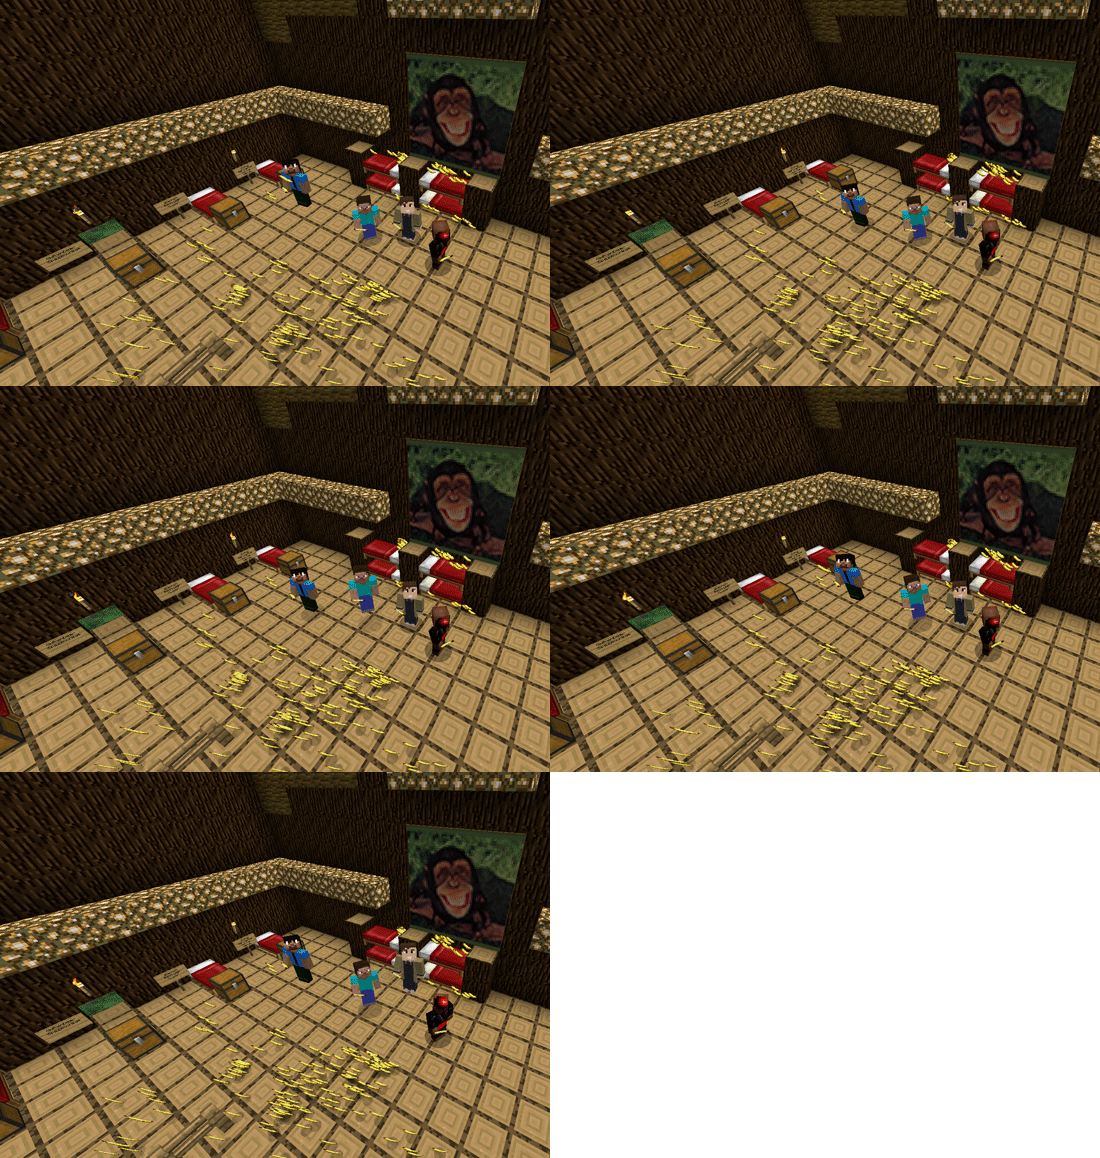
Members of The Monkey House with bananas and monkey art

3) Building Branches in The Monkey House tree.
While a short video tutorial has been requested (might be a nice little project), the basic process that I’ve used to build branches involves using the following bits.

1) the basic wood block for our tree
2) the dirt block
3) the fourth sapling
4) bone meal
5) the dark green leaves
6) the vines.

By placing a sapling on a dirt block and applying bone meal, a tree can instantly be grown on a branch. (remove the dirt block after and replace it with wood). Then add additional leaves and vines to arrive at your aesthetically pleasing result.

NOTE: For when creepers, zombies, skeletons, and spiders come wandering around, having the bow and arrow handy lets you get rid of the monsters without any explosions or collateral damage to The Monkey Hut.

Here’s an external shot of The Monkey House tree with the original large big branch. The plan will be to add additional large big branches such that each monkey can build a tree house of their own in the upper reaches of the foliage.
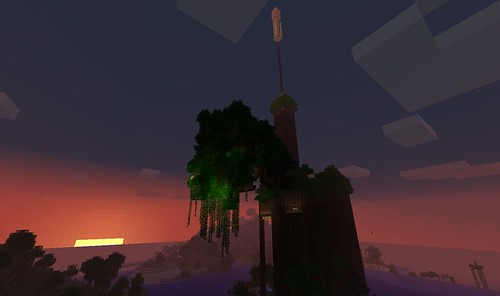
"The Monkey House tree" by aforgrave, on Flickr

"The Monkey House tree" by aforgrave, on Flickr

4) Select and Name Your Temporary Bunk: We have prepared a good number of bunks in the main level of The Monkey House tree. Select an unoccupied bunk, and then update your sign (break, then replace) with your name, your twitter name, and the type of monkey you would like to be.
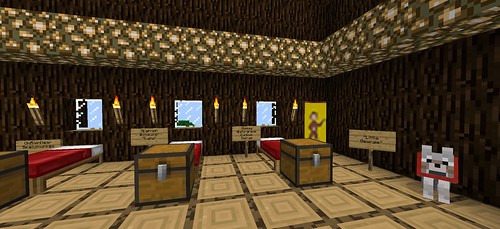
"One Funky Monkey Bunk(s)" by aforgrave, on Flickr

"One Funky Monkey Bunk(s)" by aforgrave, on Flickr

5) Members of The Monkey House can use our #tag when posting to Twitter:
We are #mONkEyhouse106.