Archive for the ‘Visual Assignments’ Category


“Troll Quotes” Tutorial

Sunday, July 29th, 2012

For the “Troll Quotes” Visual Assignment, you must first start with three famous people in mind.

Next, you need to find a photo of one of these people. You could get this image by Googling the person’s name. I chose three people that were somewhat similar, so it would confuse my blog viewers, hence the “trolling.” The point is to make the product believable, so you must be tricky! My photo was of Coco Chanel.

Take your second famous person’s name and Google quotes they have made to put on the picture. I chose a quote by Marilyn Monroe (“If you’re gonna be two-faced, at least make one of them pretty”).

And finally, your third famous person’s name will take credit for the quote. I chose Audrey Hepburn.

Use a photo editing site, such as PicMonkey, which I used, to put the text on the photo. Upload the photo to the website. You may edit the photo as you please. I tried to make mine darker so the font would stand out better. Using the text editing tool, add text to the photo. Choose the font style and color you would like. Add the quote and attribute it to the third famous person (-Audrey Hepburn) you chose. Save the edited picture from the PicMonkey website to your desktop. Upload it to Flickr or another photo sharing site and write a blog post explaining your thought process.

Here’s my completed assignment.

Not too bad, right? Good luck!
Overedit Yourself!

Saturday, July 28th, 2012

Overedit yourself!

For this assignment, I was inspired initially by Tiffany’s “Create a New You” assignment. My main inspiration came from the comment posted on my blog post after I had completed Tiffany’s original assignment.

Screen Shot 2012-07-28 at 4.46.54 PM

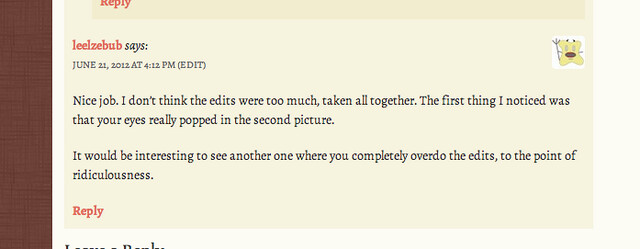
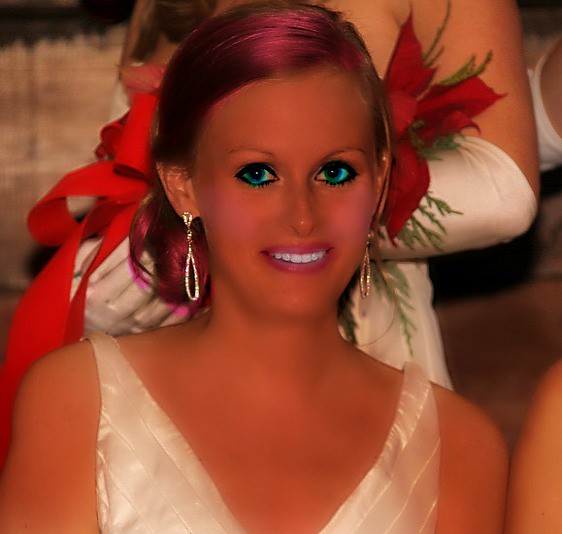
leelzeebub said it would be interesting to place extreme edits on the photo. For Tiffany’s assignment, I tried to make myself look better with the touch-ups. The point of my newly created assignment is to go all out, to make yourself look ridiculous. PicMonkey has some really cool editing tools like eye brightening, teeth whitening, hair highlights, etc. I took touch-ups to a whole new level!

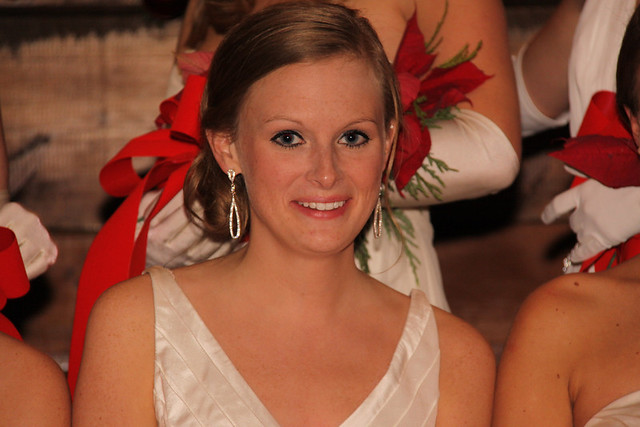
Below is the original photo, which I much prefer.

Overedit yourself!: Original

A-Z Photography

Sunday, July 22nd, 2012

My next contribution to the ds106 Assignment Repository is Visual Assignment 615: A-Z Photo Collage. The instructions read:

Make an alphabetically themed collage. Compile images to represent each letter of the alphabet within a chosen subject area or theme. Create a collage.

The potential themes are endless: items around the house, items in nature, food, flowers, even possibly things that simply make you smile. For the example, used food.

Food A-Z

After collecting photos of food that represented each letter of the alphabet, I simply opened the folder in Picasa

…and from the “create” menu, selected “create collage”

…to start the photo compilation.

Then, I adjusted the settings–style, page format, background options–and rearranged the photos to be in A, B, C order to get the final collage I wanted. Pressing the button to “create collage”, I had my A-Z Photography composition created!

I can’t wait to see others’ interpretation of the assignment, as well as the individual themes or topics that will be used for the collages. Good luck and have fun!

Slide Guy Visits the Sphinx

Monday, July 2nd, 2012

This is another Visual Assignment.  I couldn’t resist the opportunity to join in on the fun of placing the image of DTLT’s own Tim Owens in an unlikely spot.

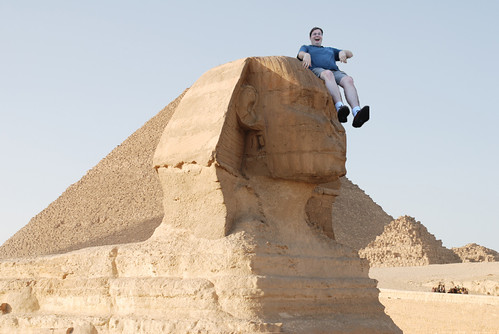
I immediately thought of the pyramids, though I’m not sure why.  But then I found this great image from Flickr User wilhemja of the pyramids and the Sphinx, and I made a slight change in plans.  I used Photoshop to flip the image using the Image Rotation–>Flip Canvas command and then rotated Tim so that he could slide down the Sphinx’s face (that daredevil).

Slide Guy Visits the Sphinx


Two final comments:

1) This image is not to scale.  If Tim were this tall, he wouldn’t be able to fit into DTLT’s offices…or any other building on campus.

2) Umm Tim, where’s the nose?

Postcards–A Legoland/Minecraft Mashup

Sunday, July 1st, 2012

So, after nearly three weeks away for a conference (and panel comment), a new talk for a Civil War Round Table, and a family trip to California, I’ve finally returned to DS106 work.  These means that I’m woefully behind as the rest of the class has moved into audio assignments.  I’ll catch up as I can, first by doing some of the Design Assignments from Week 4.  This one is for Postcards from Magical Places.

The assignment reads (corrected for typos because I can’t help myself):

Design the front and back of a postcard that might be sent from the location of a movie or a work of fiction. Both sides of the cards must be created as graphics.

The front should use graphic design elements that provide a sense of place or use the classic motifs of old postcards (“Greetings from ______”), both pictures and text. The back of the post card should contain a stamp and postmark that fits with the theme of the movie, as well as an addressee and a message that fits the plot as well.

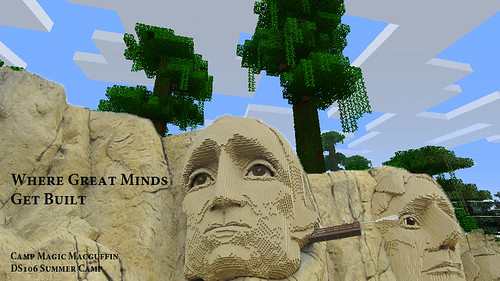
The modification that we had from Alan and Martha was that the image was supposed to come from the DS106 Minecraft server where there is some absolutely amazing stuff created by DS106 participants.  Unfortunately, the server was down when I went to it, so I ended up taking an image from a regular Minecraft instance.  But that was pretty boring, so I added an image I took on a recent trip to Legoland California.  [I took the Minecraft image as the background, and then, using the Quick Selection tool in Photoshop, removed the material in the upper right of the Lego version of Mount Rushmore, allowing the Minecraft background to show. This is all after some resizing of the two images so they matched.]

I then added some text, using a phrase that should be reminiscent on one commonly seen these days to those of us in Fredericksburg, and is an approved font from that institution.  The result was this:


Minecraft postcard--Side 1

For the second side, I created the stamp from the image of Lego Jefferson.* The expensive postcard price is an homage to the founding of UMW (as well as a tease to a relative who always scolds us when we spend more that the needed price on postcard postage).  The postmark is a stylized font in Photoshop and refers to the location of Legoland, as well as UMW.


Minecraft Postcard--Side 2

There are a few other nods, if not homages, in the letter and address.


* I think the thing next to his eye is supposed to be a Q-tip cleaning Washington’s ear, but given the past month at Mr. Jefferson’s University, I’m interpreting it as something wiping away TJ’s tears.


Splash The Color

Monday, June 18th, 2012

This week I chose to do the splash the color assignment. The reason I chose to do this one, is because I feel that this type of art is very cool. I actually did this assignment on my iPhone. I downloaded a color editor app and swiped my finger across the area that I wanted to be in color. 

Create A New You

Saturday, June 16th, 2012

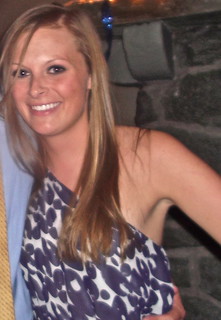
For this assignment, I went back to the handy dandy camp packing list, per usual! When I used PicMonkey for my first visual assignment, I noticed that there were many photo editing tools which could potentially be used to “improve” one’s appearance. I started off with a photo of myself and uploaded it to the free, web-based photo editing site, PicMonkey.

Create A New You: Original

(Original photo)

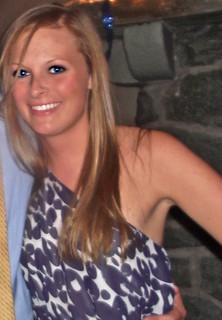
I did the typical edits, such as sharpening and cropping. Then, I selected the “Touch Up” editing tool on the site. It is represented by the lipstick tube symbol. I experimented with all of the effects. Under the “skin” touch-ups, there is a blemish fix, airbrush tool, wrinkle remover, shine reduce, blush boost, and spray tan. The “mouth” touch-ups include teeth whitening and lip tint. When I first whitened my teeth, it reminded me of an episode of Friends where Ross overly whitens his teeth for a date. It was almost scary looking! Who knew teeth could ever be too white?!

The “eye” touch-up tools include eye brightening, mascara, eye tint, and red eye remover (I did not use because I had previously dered my eyes in the photo). And finally, “the rest” of the touch-up tools included weight loss, highlights, and clone (something I also did not use).

Create A New You: Edited

I tried to implement all of the touch up tools at least a little, though I used some more than others. For instance, I used the spray tan and blemish remover. Though my eyes are naturally blue, I believe they were originally red in the photo, so I edited it with red eye removal, making my eyes dark and somewhat colorless. My eyes are not naturally as blue as they are in the edited photo, but I thought it was cool to see what it might look like! Honestly, I think I look really fake in the edited photo, but it was worth a try! Maybe I just didn’t do a good job editing ;)

Common Everyday Object

Friday, June 15th, 2012

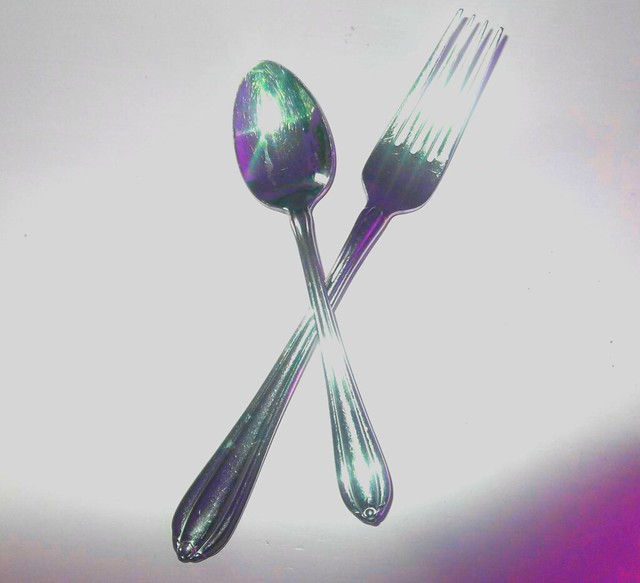
For the Common Everyday Object Visual Assignment, I started off by taking a bunch of pictures around my house. I had a hard time choosing between a photo of a clock and one of a fork and a spoon. As you will see below, I went with the fork and spoon photo! I chose to use the Aviary website again, after learning how to change the colors in photos using the hue and saturation editor through Step 9 of the “Warholizing” tutorial provided by Aviary, which I used for my “Warhol Something” Visual Assignment. I figured this new skill would be helpful in completing the assignment. I was excited to be able to reuse something I just recently learned!

Basically, all I did was experiment with the hue and saturation of my original photo. It was fairly simple, but I think the following picture looks pretty cool!

Common Everyday Object

Draw It.

Friday, June 15th, 2012

For the “Draw It” assignment, I used the free web-based image editing site, Photoshop Express. It was one of the only sites on the packing list that had a drawing transformation feature. The sites on the packing list have all been very helpful and have liked each of them for different reasons. As I continue to post Visual Assignments, you will see that I work with a variety of imagine editing sites!

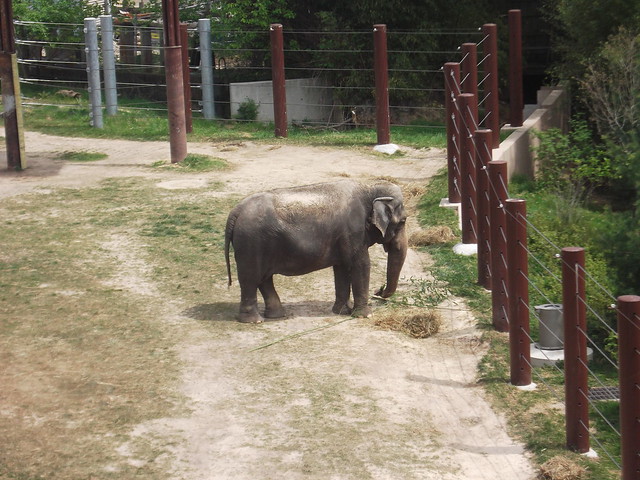
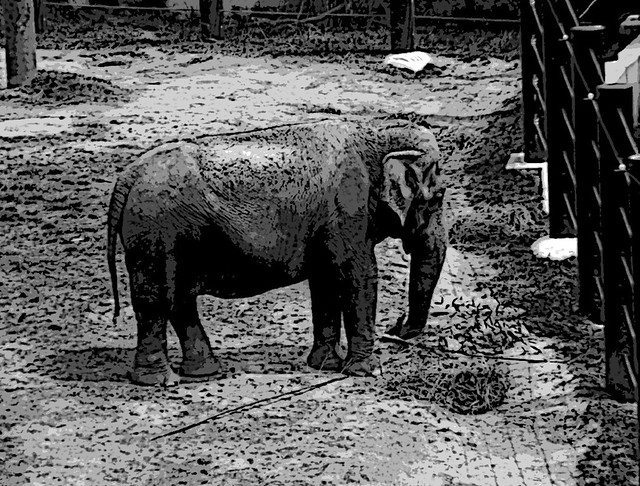
I chose to use a picture of an elephant that I photographed at the zoo a few months ago.

Draw It: Original

(Original photo)

First, I cropped the photo so the focus would be more on the cute, little (well– big) elephant! I edited the photo a bit, by sharpening the lines. I changed the color scheme to black and white and tried to brighten the white spots so they would stand out better. Then, I used the “sketch” effect and got the following result:

Draw It: Edited

Kinda cool, huh?

Warhol Something

Friday, June 15th, 2012

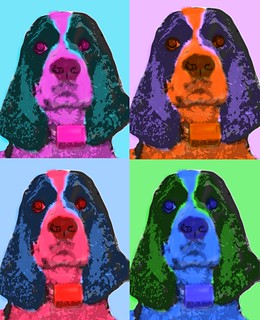
For this second visual assignment, I “Warholed Something” using the photo editing site called Aviary, mentioned on our camp packing list. Aviary actually provided a tutorial on “Warholizing” an image using their photo editing tools. I chose a picture of my dog, Tux, to “Warhol.” I followed the instructions step-by-step in the tutorial and I think I was fairly successful!

Warhol Tux